
Upon first looking at a shard of prehistoric Ceramic period pottery from the Sebasticook River in Winslow, Maine, the tiny grid-like patterns impressed in the clay look much like a piece of woven cloth, like burlap, pressed into the wet clay.
However, a close examination of the pieces reveals a very different and much more laborious decorative method. These methods vary widely from shard to shard and it is difficult to figure out exactly what hand tools were made to create these impressions.
One of the most interesting designs is shown below, from a small shard less than one inch square. At first glance this pattern looks like it is part of a large-scale impressed design (ie. from a paddle, knotted string or woven cloth). But close examination shows this design was made row by row by a tiny hand stamping tool. Each of these rows is barely 1 millimeter high and about 1 cm long. As the photos show, the entire pattern is repeated up the shard, with each row staggered slightly to the right.

This one shard is very interesting because it confirms that this patterning was made by the repeated use of a very small stamping tool with regular square notches cut into it. No other design technique could make this type of pattern. What is most bizarre is that a very close examination shows that each row was made by two stamps. This is shown by the clear impression of two tiny squares at the beginning of the row that merge into each other toward the right. That these two tiny squares are not part of one stamp can be seen in how they are slightly offset from each other in some repetitions of the pattern. The photo below shows the same shard tilted vertically:

The next shard shows a similar pattern that is clearly made by a very small (1 mm x 1-2 cm) stamping tool applied horizontally and then repeated vertically on the pot. The key to seeing the application process is that each horizontal row is exactly identical to the one below it. A multi-rowed patterning tool (ie. a paddle with corded string, or wrapped, knotted string) could not have done this because the impressions in each row are exactly identical.


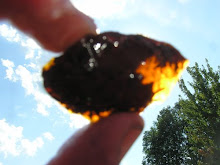
The size and precision of these patterns is shown by the yellow stone in the upper right hand corner of the shard. It is about 1.5 mm in diameter, smaller than a BB. The Sebasticook River prehistoric potters used coarse sand and crushed rock as temper to strengthen the local clay during the working and firing process.
At first examination, I thought this second set of impressions looked less like a stamp and more like it was made with a toothed shell. But the third impression in the row (from the left) is quite tilted and out of parallel. Shells which have finely enough scalloped edges to make an impression like this have perfectly parallel and regular spacing. This does not.
So what on Earth did these prehistoric Sebasticook potters use as tools to make these tiny, sequential, geometric rows of impressions? I don't know. But to make things even more confusing, here's another set:

This is the highly carbonized piece of the rim of a 12 inch wide vase with a similar, but not identical, impression as above. The inside surface of the same piece (ie. the inside surface of the pot rim) shows the same pattern (and tool) used, but in a much more loose and haphazard manner. The aggressive and non-decorative impressions on the inside curve of this rim shows the impression tool was used not so much to make a pattern but to form, define and strengthen the pot rim itself.

What strikes me about all three of these impression patterns is that they are all of the same size (1 mm wide x 1 cm long) but are very different from each other. The first has a pattern which is rigorous geometrical, with tiny squares. The second and third are much looser, rounded and curved. Their tiny size and repetition patterns shows they were made with very small, pre-made tools, about the length of a pencil tip but much narrower, with very regular indentations cut into them.
What Tools Made These Marks?
The very small and precise markings on these pot shards suggests they were pressed into the clay with a tool small enough to contain five to six equally spaced impression in a 1 mm x 1.5 cm row and this row of impressions was the basic unit of design by repetition around the pot surface while the clay was still soft and flexible, but after the overall form was completed and smoothed.
The very small size of the impressions greatly limits the possible materials for the tool that made them. The tool had to be easy to hold and comfortable enough in the hand to allow for great precision in aligning each row of impressions next to each other and above each other. The tool material had to be soft enough to carve geometric notches but hard enough to retain the desired shape of the notch without chipping or cracking. Bone would be one possibility, however the very tiny notches would be difficult to cut into bone with a stone tool without chipping. The bone would have to be very small (much smaller than a deer antler, for example), and notching such a small bone would be difficult without breaking it. At one point I considered as a candidate the edge of a freshwater mussel shell with notches cut into it with flint. However, after experimenting myself with this approach it became obvious that the shell is far too hard to be notched with flint. When you try it, the flint wears away faster than the shell it is supposed to be notching.
While I have no idea if the following idea is true, the best candidate for a tool material for these markings seems to be fired clay. More specifically, the potter created a small button of clay with one flat side and while the clay was in the leather hard stage, cut tiny regular notches or teeth into it with a small, very sharp shard of flint. When complete the tool was allowed to dry and then was fired with the next load of pots. Once fired, the tool would be extremely durable and the geometric shape of the notches would remain exactly as they had been cut. A second benefit of this technique is that these fired clay stamping tools could be made very quickly and in large quantity and once fired they would be as durable as stone. This would be in sharp contrast to other materials (such as bone or stone) which would be much more difficult and time consuming to make in such a small size.


1 comment:
Greeat post thank you
Post a Comment